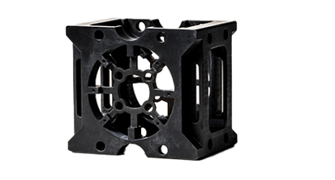
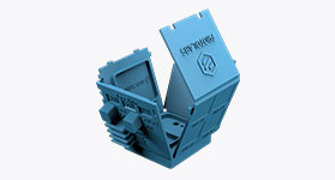
When you think of injection molding, the image of a straight-pull mold is probably what first comes to mind. It’s the classic A-side and B-side mold that closes together to form the final part. It’s the simplest, fastest way to mold a plastic part. But more complex designs will often require more advanced molding techniques.

Solving Undercuts with Side-Action Cams
Before we get into side-actions, let’s discuss why they’re necessary in injection molding design. More complex part geometries will frequently include undercuts—features that restrict the mold from cleanly pulling apart. Sometimes, more flexible materials, like a silicone rubber, can flex around these features, but you wouldn’t want to try it with an ABS or glass-filled nylon. That’s where side-actions come into play.
There are three primary considerations to make when designing a part that will need a side-action.
- The undercut should be on the outside of the part so there is room to pull the mold section clear of the part, including space for the cam mechanism.
- The feature that the side-action is making does not have to sit on the parting line, but the cam needs to come from the parting line up to the feature.
- Make sure the faces on the interior of your part are drafted in the same direction that the side-action moves, so the side-action can withdraw from the tool without distorting the part.

Machining Custom Inserts for Tooling
In some cases, the fastest and most cost-effective solution for undercut features is to machine a custom mold insert called a pickout. Pickouts can provide more design freedom than side-action cams since they don’t need to align to the mold in any particular way. A common use case for pickouts is a boss feature on an angled surface.
Sometimes certain features can cause challenges when machining the mold. Fabricating a mold for a part design that includes a small hole going through the part is a common issue as they require tall, thin features that can be risky to machine. Instances like these can be solved with core pins, which maintain a steeper draft angle and are affixed to the mold, similar to a pickout insert.
Multi-Cavity Tooling for Low-Volume Production
For production runs, more complex tooling, while being more expensive to fabricate, can lead to cost savings through faster cycle time and lower piece-part price. Smaller, simpler parts are good candidates for multi-cavity molding, which can produce two, four, and eight parts in a single shot. Self-mating parts can also be molded in the same tool—two sides of a hinged enclosure, for example.
Multi-cavity tooling does limit the potential for side-actions, so sometimes design concessions need to be made in favor of a simpler geometry. Pickout inserts are still an option for multi-cavity molds and can be used in much the same way as they are for single-cavity molds.
Injection Molding Design Book
For more detailed information on all of the above, plus other considerations for injection molding design, order a free copy of Injection Molding Design for Dummies.


