

FDM vs. SLA: Comparing Filament and Resin 3D Printers

Additive manufacturing, and specifically modern 3D printing, has come a long way since its initial development in 1983. Today’s 3D-printed parts can achieve high resolution and tolerances. Two of the more common techniques are stereolithography (SLA) and fused deposition modeling (FDM).
While both emerged in the 1980s, they use distinctly different ways to make parts, and as a result, final parts each provide varying benefits. Both technologies play a critical role in rapid prototyping. You can quickly create fit, form, and function prototypes or even demo models for future customers or investors. Both SLA and FDM can get you a part in hand quickly and also undergo post processes like smoothing or painting to give a good idea of what the final product will look like. While the general use case for rapid prototyping is the same, choosing which technology to use ultimately comes down to the specific part geometry and purpose of the prototype.
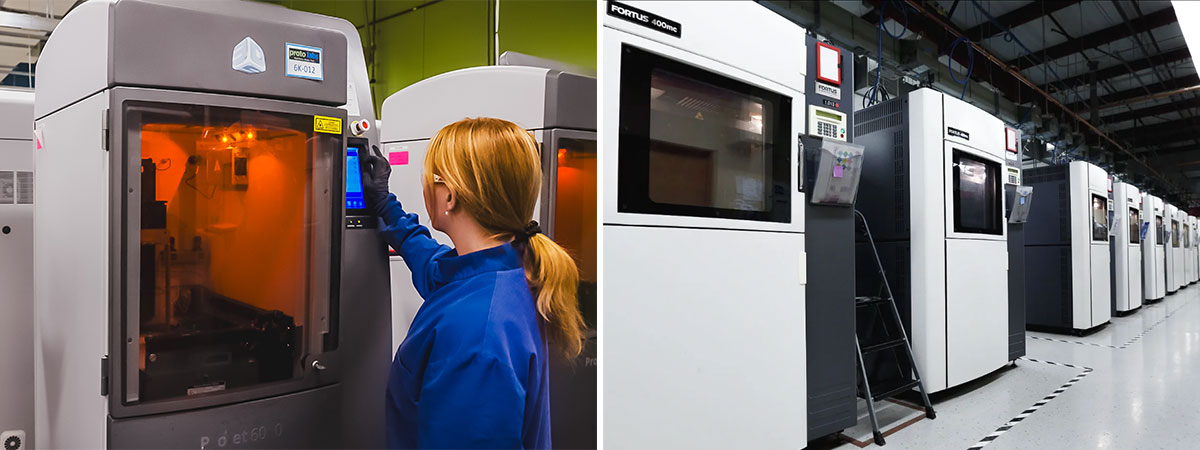
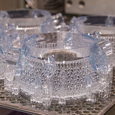
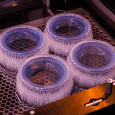
An engineer tends to an SLA printer (left). A group of FDM printers hard at work (right)
How Does SLA Work?
SLA uses photopolymer resins as the raw material for its parts. Photopolymers need intense ultraviolet light from a laser in order to set, and that’s the central idea behind SLA. The build takes place on a platform submerged in resin. A laser sits above the tank and, directed by precision mirrors, cures the liquid resin, hardening it to achieve the desired part shape, one layer at a time. The support structures are the first layers created, ensuring that the part is fastened securely to the platform and adequately supported. With each pass, a recoater blade breaks the surface tension of the resin above the part and offers additional material to continue the build. The part is built from the bottom up.
How Does FDM Work?
One of the earliest forms of 3D printing, FDM was invented by one of the founders of Stratasys, Scott Crump. The concept is simple—it’s a lot like using a hot glue gun. A thermoplastic filament or spool of plastic is heated to the melting point. The hot, liquid plastic emerges through a nozzle to create a thin, single layer along the X and Y axes on the build platform. The layer cools and hardens quickly. As each layer is completed, the platform is lowered and additional molten plastic is deposited, growing the part vertically (along the Z axis).
Material Properties of SLA and FDM
| SLA | FDM (industrial) | |
| How it Works | Laser-cured photopolymer | Fused extrusions |
| Strength | 2,500-10,000 (psi) 17.2-68.9 (MPa) |
5,200-9,800 (psi) 35.9-67.6 (MPa) |
| Finish | Additive layers of 0.002-0.006 in. (0.051-0.152mm) typically | Additive layers of 0.005-0.013 in. (0.127-0.330mm) typically |
| Common Materials | Thermoplastic-like photopolymers similar to ABS, PC, and PP True Silicone Ceramic-like PerFORM MicroFine for high resolution |
Nylon: Markforged Onyx *** PEI: Ultem 9085, Ultem 1010 ASA: Stratasys ASA ABS: ABS M30, ABSplus |
| Resolution | Normal, high, micro | Low |
| Maximum Part Size (SLA is resolution dependent) | Normal 29 x 25 x 21 in. (736 x 635 x 533mm) * | 15.98 x 13.97 x 15.98 in. (406 x 355 x 406mm) ** |
| High 10 x 10 x 10 in. (254 x 254 x 254mm) | ||
| Micro 5 x 5 x 2.5 in. (12 x 127 x 63.5mm) | ||
| Minimum Feature Size (SLA is resolution dependent) | Normal X-Y: 0.010 in. (0.254mm) Z: 0.016in. (0.406mm) | 0.0787 in. (2.0 mm) |
| High X-Y: 0.005 in. (0.1016mm) Z: 0.016 in. (0.406mm) |
||
| Micro X-Y: 0.0025 in. (0.0635mm) Z: 0.008 in. (0.203mm) |
||
| Isotropic Materials Properties | Highly isotropic parts | FDM parts are anistropic |
| Wall Thickness (SLA is resolution dependent) | Normal 0.010 in. (0.254mm) | 0.0315 in. (0.8 mm) |
| High 0.004 in. (0.1016mm) | ||
| Micro 0.0025 in. (0.635mm) |
SLA Considerations: Resin 3D Printing’s Fine Features and Strength
The key features of SLA are the ability to create tiny features and produce a part with a smooth surface finish. The layer height options for SLA start at 0.004 in. (0.102mm), which greatly reduces the appearance of layer lines compared to FDM whose builds typically start at layer heights of 0.008 in.-0.005 in. (0.2-0.12mm).
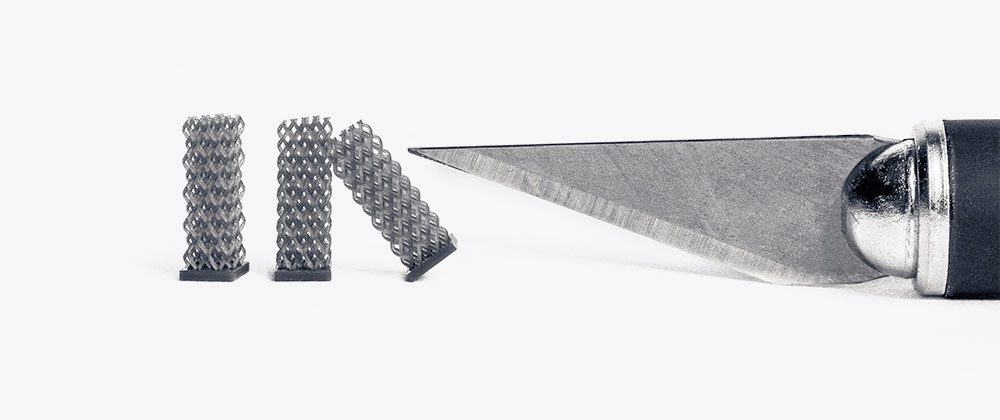
When it comes to feature size, the precision of the UV laser is like drawing with a fine tipped artist’s pen. It excels at features as small as a piece of printer paper is thick. For parts with lots of fine detail such as microfluidics or Dungeons & Dragons miniatures, SLA is the way to go.
SLA’s most notable limitation is that the materials are designed for short-term use only. Typically, SLA is used exclusively during the prototyping stage or for single-use parts. The parts are UV-cured, which makes them relatively brittle compared to their thermoplastic counterparts. As they’re exposed to additional UV rays, they will become increasingly more brittle and may also discolor. While actual longevity can vary depending on environment, SLA parts usually start breaking down around the 8–12-month mark.
Precision Printing
MicroFine™ is a custom-formulated SLA material available in gray and green that is exclusive to Protolabs. This ABS-like material is 3D-printed in our customized machinery to achieve high resolution features as small as 0.0025 in. (0.0635mm). MicroFine is ideal for small parts, generally less than 1 cubic inch. In terms of mechanical properties, MicroFine falls in the mid-range of SLA materials for tensile strength and modulus and on the low end for impact strength and elongation.
FDM Considerations: Filament 3D Printing Cost and Durability
Offered through the Protolabs Network, FDM’s key features include a range of available materials and its low cost. Unlike SLA, which uses thermoset resins, FDM works with the same thermoplastic materials that are used in molding such as ABS, PLA, PETG, or TPU. It’s also possible to use PP or carbon-filled materials. Additionally, materials like ABS and PLA come in a wide variety of colors, which removes the need to paint or dye parts after building. Filament materials are generally less expensive than the resin alternatives required with SLA.
Another cost saver, and one of the biggest differences between SLA and FDM is that FDM needs little to no additional infrastructure besides the machine itself. Industrial SLA machines require a processing station to remove uncured resin from the parts and put the parts through a UV-post cure to lock in the mechanical properties. FDM doesn’t require any of these steps, which makes the process, and therefore the cost, much less expensive.
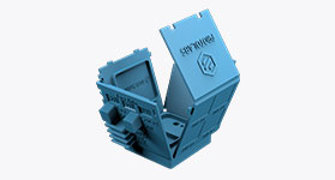
The other component that helps reduce the cost of FDM builds is infill. The software used for FDM printing allows you to hollow out your part during the build and replace the solid insides with a lattice. This means that you can get a 1 in. (25.4mm) cube without using a full cubic inch of material, thus avoiding the cost of building a solid cube. There are many types of infill patterns and densities that allow for volume reduction (which also saves time and cost) while also making sure the part meets all structural requirements. FDM is unique in that it is one of very few additive technologies in which parts aren’t surrounded by raw material. If you tried to use infill on an SLA part, the entire inside would be full of trapped liquid resin.
FDM parts are considered stronger and more durable than those made using SLA, especially when using ABS or nylon as your material. As we touched upon earlier, one of the reasons for this is the very nature of how SLA parts are made—using a UV-laser to harden resin. There is always a sensitivity to light and the tendency for SLA parts to fade and become brittle, given that exposure. That's not true of FDM parts, making them more durable.
That said, one primary limitation of FDM printing is that the orientation has a large impact on mechanical performance. With SLA, there is some overlap between the curing of each layer, increasing overall strength. However, with FDM there is no such overlap, resulting in parts that tend to break along layer lines. When designing parts for FDM, it’s important to understand the direction in which force will be applied and then build the part so that the main forces are not pulling the layers apart.
Aesthetically, FDM falls short of rival 3D printing methods in that each layer line is often very visible. This may not be a problem if surface detail is less of a priority, but post processing will be necessary to get most FDM parts appearing comparable to the smooth finish of an SLA alternative.
The cooling of the filament after extrusion with FDM printing also creates geometry limitations that aren’t present with SLA. For example, parts with 90-degree corners are likely to warp up off the build platform if there aren’t radii. Also, low-angled overhangs, even if supported, tend to peel up, causing rough down-facing surfaces.
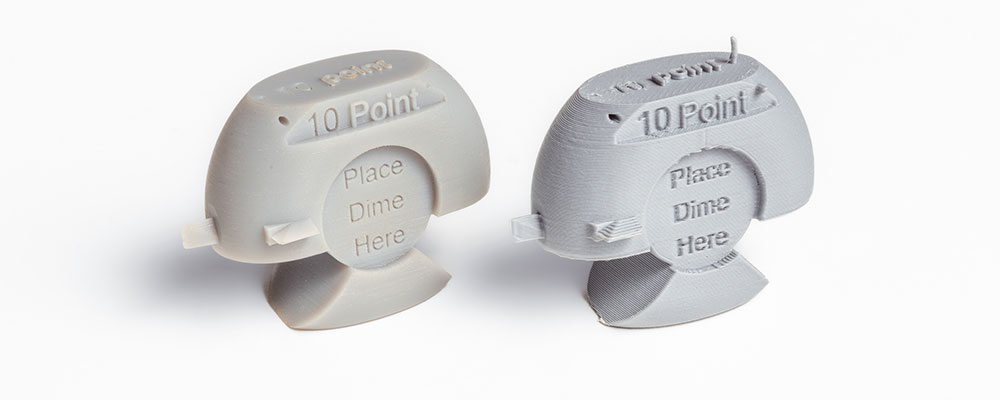
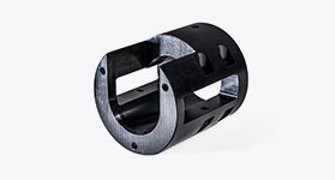
SLA (left) excels in small features and overall surface detail compared to FDM (right)
When to Use SLA and FDM
The decision to choose SLA or FDM depends on the purpose of the part and the budget of the project. SLA will give you a more precise part that has a look and feel closer to that of molding. On the other hand, FDM will give you a more durable part and can build in the same material with which you plan to mold. In some cases, you may want an SLA prototype as a presentation tool, but an FDM part for its durability during functional testing.
Here are the key points to consider when deciding.
Use SLA for:
- Precision and fine feature detail, as with fit-check prototypes or microfluidics
- Smooth surface finish without post-processing, such as molds or cosmetic prototypes
- Short-term use cases
Use FDM for:
- Thermoplastic materials with large color selection
- Cost-effective prototypes
- Durable, end-use parts, such as custom jigs and fixtures
Alternatives to SLA and FDM
Of course, SLA and FDM aren’t the only games in town. PolyJet and Carbon DLS might be good bets for your application, too.
The PolyJet process begins by spraying small droplets of liquid photopolymers in layers that are instantly UV cured. Voxels (three-dimensional pixels) are strategically placed during the build, which allow for the combination of both flexible and rigid photopolymers known as digital materials. Each voxel has a vertical thickness equal to the layer thickness of 30 microns. The fine layers of digital materials accumulate on the build platform to create accurate 3D-printed parts. PolyJet parts are moderately priced and available in a range of durometers. You can even prototype overmolded parts with this process.
Carbon DLS uses CLIP (continuous liquid interface production) technology to produce parts through a photochemical process that balances light and oxygen. It works by projecting light through an oxygen-permeable window into a reservoir of UV-curable resin. As a sequence of UV images are projected, the part solidifies, and the build platform rises. It’s a fast process and produces durable parts.
To get your next design project started today, simply upload a 3D CAD model for an interactive quote within hours.

If you have any issues getting your guide, click here to download.