


It’s no secret that 3D printing processes don’t produce injection molding-quality surface finishes right off the printer, but there is good news. Technologies exist to help, and there are new developments all the time. As post-processing becomes less manual and more automated, the cost of 3D-printed parts will come down.
Support structure removal—or in the case of selective laser sintering (SLS) and Multi Jet Fusion (MJF), powder cake removal—is the first step to freeing printed parts from support structures needed for the build. For a quick read on how we are leveraging new technologies for support removal, check out this PolyJet case study. Once a part is freed from its printed supporting layers, there are many ways to address surface roughness depending on which material was used. In some cases, you could be better off not addressing it at all if it makes sense for your application.

Why Smooth 3D-Printed Parts are in High Demand
Why has smoothing become so popular? Lots of reasons. Smoothing can:
- Improve aesthetics
- Allow for better coating and paint or dye adhesion
- Aid in chemical resistance
- Help lessen corrosion potential
- Improve durability
- Reduce porosity, sealing surfaces for easier cleaning and sterilization
- Eliminate surface defects that could become weak or failure points
- Minimize friction effects
- Improve conductivity
- Improve water resistance
- Create injection molded-like surfaces on additive parts
This is by no means a comprehensive list, but maybe it gives you some points of consideration when evaluating your part texture.
Measuring Surface Roughness
The most widely used measure of surface roughness is Ra, or the average roughness between a roughness profile and the mean line. Ra is the deviation from the ideal surface plane measured in microinches or micrometers. A larger Ra unit equates to a rougher surface. For example, often selective laser sintering and Multi Jet Fusion 3D printing surfaces get compared to a cube of sugar or a pair of blue jeans.
For most engineers, establishing an upper limit for surface roughness is required as it is generally not desirable for mechanical application or aesthetic reasons. Sometimes, Ra specifications are used when human factors engineering requires “grippy-ness” on a handle or touchpad, for example. For a deeper dive on surface roughness parameters, check out ISO 25178.

Smoothing FDM Parts
 The fused deposition modeling (FDM) process creates uneven layers during the print. There are quite a few options: Current smoothing methods include:
- Sanding
- Gap-filling
- Polishing
- Painting
- Vapor smoothing
- Dipping
- Epoxy coating
- Metal plating
Each method has a specific effect on part tolerances, so be sure you understand any tradeoffs you might be making before initiating one of these smoothing processes.
Smoothing Stereolithography Parts
The stereolithography (SLA) process creates a much smoother surface right off the printer compared to FDM because it doesn’t rely on a filament-based approach. Two common methods for smoothing SLA parts include manual sanding and media blasting. Media blasting can be done with sand, grit, or ceramic beads. Often hand-sanding or a combination of both methods is required to achieve a uniform texture, and circular sanding motions work best. To achieve a higher polish, use a high-grit sandpaper.

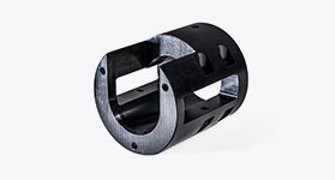
Smoothing Selective Laser Sintering (SLS) and Multi Jet Fusion Parts
Powder-based printing processes like SLS and MJF can leverage manual sanding for functional applications. However, we have found that sandpaper doesn’t quite smooth these surfaces to our level of scrutiny, even with high grit paper, especially if a paint application is required. The result can feel smoother, but the texture changes to more of a velvet-like surface. It’s not a 1:1 comparison to the way SLA parts sand. Truly smoothing these materials is best achieved using machining.
Nylon and TPU parts also rely on additional techniques such as chemical or vapor smoothing to essentially melt the surface into a uniform texture. This method is becoming more widespread. We always dye our MJF parts black to create a uniform aesthetic appearance. If you want a smoothly painted SLS or MJF part, it’s best to start with a heavy layer of primer to seal the material. The primer can be smoothed out before paint application occurs.
Smoothing Metal 3D-Printed Parts
Whether you’re printing or machining metal parts, smooth surfaces are expected. With additive manufacturing, post-print machining is one way to achieve take off those rough edges. Other possibilities include:
- Shot peening the entire part, or you can polish or burnish specific regions of the part
- Electrochemical polishing or etching
- Vibratory finishing, tumbling and centrifugal finishing are also good ways of smoothing out surfaces. Like media blasting and shot peening, these processes work well for finishing external surfaces, but accessing internal surfaces and channels can be challenging.
- Abrasive flow machining (also known as extrude hone) for interior wall smoothness. This uses an abrasive media that essentially erodes and deburrs internal pathways.
- Isotropic superfinishing, which uses vibration and polishing to give the part a mirrorlike finish
It should be noted that there are some cases where rough surfaces and maximizing overall surface area are integral to a part design. One of the most cited examples is a structural implant that requires osteointegration (bone growth into an implant) to achieve its function. Stryker is one company that is pioneering what additive porous implant design can achieve.
Controlling the surface finish of additive parts and automating the process are both advancing at rapid speeds and we’re excited to see what additional processes take off in the next five years. For a back pocket resource, check out our 3D Printing Surface Finish Guide to see closeup examples of parts and surface finishes that we can produce using each of our 3D printing technologies.