


Injection Moulding Costs – Cutting Them Without Cutting Corners
Your masterclass in product design and development
Protolabs’ Insight video series
Our Insight video series will help you master digital manufacturing.
Every Friday we’ll post a new video – each one giving you a deeper Insight into how to design better parts. We’ll cover specific topics such as choosing the right 3D printing material, optimising your design for CNC machining, surface finishes for moulded parts, and much more besides.
So join us and don’t miss out.
Insight: Injection Moulding Costs – Cutting Them Without Cutting Corners
Hi and welcome to this week’s Insight video..
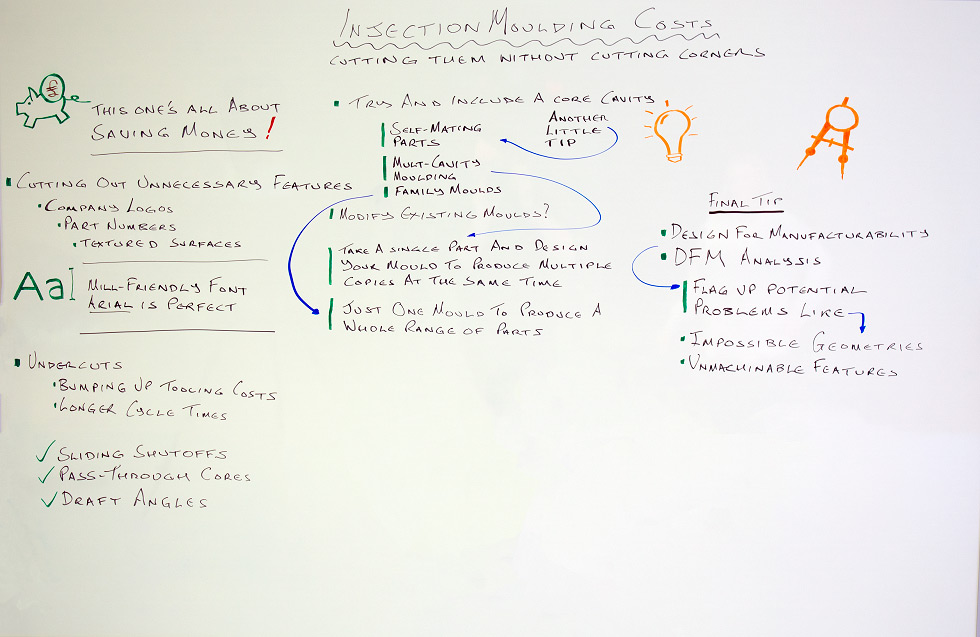
Now, we don’t have time for much of an intro this week, because they only give me five minutes and we have a lot to get through. Which is good for you, because this one’s all about saving money.
Specifically, we’re taking a quickfire look at a few ways you can cut costs around injection moulding. Some of these are fairly obvious, some of them are a little trickier, but they all work.
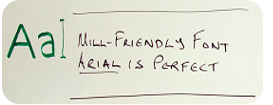
Let’s kick off with a fairly simple idea – cutting out unnecessary features. We’re talking about things like company logos, part numbers and nice, textured surfaces.
These are all nice things to include, but if cost is a concern then these are easy little luxuries to shave off. And if you do need to include a logo or lettering, make sure to go for a mill-friendly font. Something plain, like Arial, is perfect.
Similarly, if that nice finish is important for the part, check to see if all of it needs to be treated the same way. There’s not much point in polishing up both sides of a part if only one is actually visible in the finished product.
Next up we have undercuts. They force you to add extra things to the mould, bumping up tooling costs, as well as needing longer cycle times. Again, all extra costs you want to avoid.
Basically, if you can get rid of an undercut, do it.
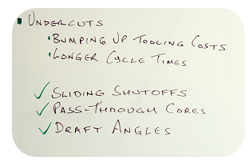
Of course, that’s not always possible. Lots of slide-actions rely on undercuts to actually work, for example. In this case look to alternatives like sliding shutoffs and pass-through cores or try changing the parting line and draft angles to provide an easier mould build.
From something to avoid, we move onto something to try and include wherever possible – a core cavity.
Now, this is something you’re usually going to run into if you need an electronics housing or a similar box-shaped part. There are two ways to go about making this. First, you could sink the wall cavities deep into the mould base, requiring long thin tools to machine ribs into the mould. Or, alternatively, you could machine the aluminium material down around the core and mould the part around it.
That second option is a core cavity, and it’s a much more cost-effective method to build this kind of part. Better yet, this makes it easier to provide smooth surface finishes and can eliminate the need for super-steep draft angles.
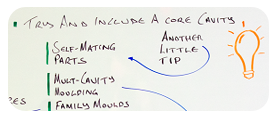
Another little design tip that can save you cash is to create self-mating parts. Before you start making any jokes, that just means parts that can snap together with themselves.
The main use for this comes when you’re building a case or some device that needs two halves that lock together. Rather than having different designs for each bit, redesign the snaps so they fit from either direction. That way, rather than having one production run for part A and another for part B, you just have twice as many of your self-mating parts and cut your up-front expenses in half.
Sticking with those economies of scale, let’s have a quick run through on multi-cavity moulding and family moulds.
The idea behind multi-cavity moulding is pretty simple – take a single part and design your mould to produce multiple copies at the same time. This can be a little more expensive when it comes to tooling, but the savings from getting all those parts at once should more than balance that out.
Family moulds follow a similar idea, but rather than producing copies of one single part, they use just one mould to produce a whole range of different parts – ideally ones that fit together. These don’t really increase the tooling costs – you’d be tooling all those different moulds anyway – but it does need all the pieces to be made of the same material and to be roughly the same size, so that they have similar processing times.
Another good way to save money on your moulds is through modifying existing ones rather than creating them from scratch every time you change your design. This is a little more complicated than it looks at first glance, because while removing metal from a mould is easy, adding it back in is… tricky.
With a bit of careful planning, though, you can use the same mould over and over again. The best way to do this is to start off with the smallest, most basic part design, mould as many pieces as needed, then re-machine the mould to include additional features. It’s not an exact science, but given the right part, the savings can really add up.
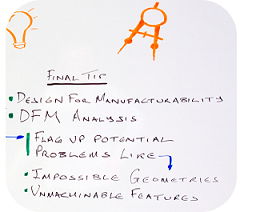
My final tip for you is to get some Design For Manufacturability or DFM analysis. This is basically a check-up where the experts take a look over your design and flag up potential problems like impossible geometries or unmachinable features, and offer up ways that the production process could be made a little smoother.
This is a great way to save money, because it’s usually free.
Until next week.
With special thanks to Natalie Constable.
Other Videos >


