


Injection Moulding Examples in Everyday Products
Injection moulding is often the best option when you need consistent, high-volume production that other methods like CNC machining or 3D printing can’t match. It’s especially useful when you need:
- Lots of parts (100 or more)
- Complex shapes with thin walls or undercuts
- Consistent accuracy across thousands of parts
- Lower cost per part once tooling is paid for
- Materials that flow and perform well when melted, like thermoplastics
For very low volumes, 3D printing can be quicker and more affordable, but as quantities climb, changing from additive manufacturing to injection moulding may be the smarter option.
How Injection Moulding Works
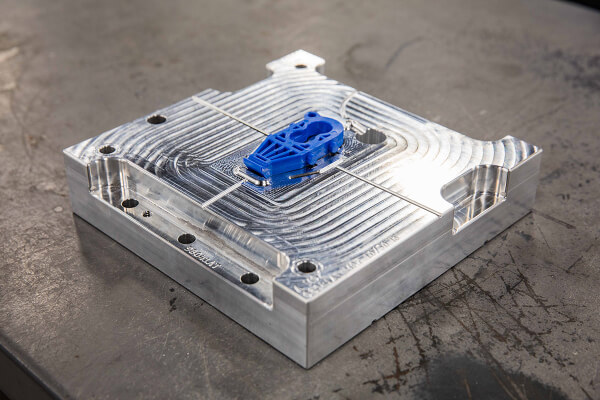
Plastic injection moulding works by melting plastic pellets and injecting the liquid into a steel or aluminium mould under pressure. When it cools, the part pops out in the exact shape of the mould.
The success of this process depends on how the plastic flows, how evenly it cools, and the shape of the part. Get those basics right, and you’ll get good results.
Industry Applications of Injection Moulding
Injection moulding shows up anywhere you need lots of identical, high‑quality parts. Each injection moulding example here, from intricate medical devices to robust engineering components, showcases the method’s ability to balance speed, precision, and cost-effectiveness.
Medical
Medical devices like surgical tools and drug delivery parts need biocompatible materials and tight tolerances. Injection moulding delivers smooth, sterilisable surfaces and handles complex details.
See the Sooma Medical case study
Automotive
Dashboards, vents, and switches for automotive applications must look good and function reliably. Moulding combines multiple features in one part and supports fast production.
Check the TRW Automotive case study
Consumer Electronics
Speaker housings, gadget cases and other electronic parts need strong structures and clean finishes. Moulding delivers both the performance and the aesthetic.
See the Sonos case study
Aerospace
Planes and other aerospace innovations need lightweight yet tough parts like panels and connectors. Moulding produces reliable components that hold up in extreme conditions.
Read the Nokia aerospace case study
Common Part Types in Injection Moulding
Certain part categories showcase exactly why injection moulding is such a popular choice. It’s precise, scalable, and can combine complex features in one go.
- Housings and enclosures: Great for electronics cases and covers. Keeps walls thin and consistent, adds built‑in bosses or snaps, and maintains durability.
- Connectors and fasteners: Tiny connectors need tight tolerances and high strength. Moulding delivers precise dimensions with tough materials like glass-filled nylon.
- Gears and mechanical components: Small gears and pulleys require clean, accurate teeth that resist wear. Moulding achieves this, especially with engineering plastics like POM (Delrin).
- Optical components: Lenses and light guides demand flawless finishes. Moulding achieves smooth, clear surfaces and precise geometry, as explained in our optical design tips.
- Caps and closures: Everyday bottle caps and cosmetic lids show how moulding handles both form and function at high volumes.
- Bezels, brackets and trays: Frames, support parts and trays are good examples of how moulding can combine structure with scalability.
| Part type | Typical features | Key materials |
|---|---|---|
| Housings and enclosures | Thin walls, bosses, snaps | ABS, PC, PP |
| Connectors and fasteners | Tight tolerances, durability | Nylon, glass-filled nylon |
| Gears and mechanical components | Accurate teeth, wear resistance | POM, nylon |
| Optical components | Smooth, clear surfaces | PC, acrylic |
| Caps and closures | Seals, decorative finishes | PP, PE |
| Bezels, brackets and trays | Frames, supports, trays | ABS, PC, PP |
Best Design Features for Injection Moulding
Some design features just work better with injection moulding. They add function while keeping parts manufacturable and cost-effective:
- Ribs and bosses: Add strength to thin parts without much weight. Keep ribs 60–80% of wall thickness to avoid sink marks.
- Living hinges: Thin, flexible hinges connect rigid sections. Work best in polypropylene for flip‑tops and folding parts. Keep hinge thickness around 0.25–0.5mm.
- Snap‑fits and assembly features: Cut out screws and glue. Cantilever snaps work for removable parts, while torsional snaps are good for permanent joins.
- Undercuts and complex geometry: Side‑actions in the mould make threads, channels, and interlocking features possible but add tooling cost.
- Threads: Common in caps, fasteners, and connectors. They require special tooling to release from the mould, so designs should account for cost and complexity.
Material Selection for Different Applications
Picking the right material makes a huge difference to performance and cost. Here are some of the most common options:
- ABS: Tough and impact-resistant, great for everyday housings and cases.
- PC (Polycarbonate): Handles heat well and stays clear, so it’s often used for lenses and covers.
- PA (Nylon): Strong, durable, and resistant to many chemicals.
- PP (Polypropylene): Resists chemicals and bends without breaking, which makes it perfect for living hinges.
- PEEK: Stands up to extreme heat and harsh environments.
If you need something not listed, Protolabs can usually source it by request. Message [email protected] with your requirements.
Surface Finishes and Aesthetic Considerations
Different surface finishes for injection moulding can give parts almost any look or feel, from shiny, mirror-like finishes to rough textures. And finishes can also change performance, like reducing friction, improving wear resistance, or boosting grip.
- Polished finishes: Perfect for lenses, light pipes, and premium consumer products.
- Textured surfaces: Add grip, reduce glare, and hide scratches.
- Colour integration: Use coloured resins to skip painting and speed up production.
- Gate placement: Put gates in hidden or non‑critical areas for a cleaner look.

Scaling From Prototype to Production
Moving from a few test parts to full production takes planning. Protolabs makes it easier with on-demand manufacturing, so you can order parts as you need them without needing to keep large inventories on hand.
Short-run injection moulding with aluminium tooling is great for prototypes and small runs. As volumes go up, switching to steel tooling makes production more cost-effective.
Family moulds and multi-cavity designs help cut per-part costs in high-volume production. Family moulds make different parts in one cycle, while multi-cavity moulds make several of the same part at once.
Scaling by Volume: Tooling and Cost Benchmarks
| Volume Range | Tooling | Lead Time | Cost/Part | Best For |
|---|---|---|---|---|
| 1-25 | Alternative processes | 1-5 days | €6-60+ | Prototyping, concept validation |
| 25-500 | Aluminium tooling | 10-15 days | €2-18 | Low-volume production, market testing |
| 500-10,000 | Aluminium tooling | 10-15 days | €0.60-6 | Bridge production, seasonal products |
| 10,000-100,000 | Steel tooling | 3-5 weeks | €0.25-2.50 | Medium production runs |
| 100,000+ | Steel multi-cavity | 4-8 weeks | €0.06-0.60 | High-volume production |
When you’re moving from prototype to production, it is a good idea to check tolerances and quality requirements early so your specs line up with what the process can actually deliver at each stage.
How to Prevent Injection Moulding Defects
Even well-designed parts can run into cosmetic defects during moulding. Here’s what engineers should look out for in design, and how smart design choices can help:
- Sink marks: Thick sections cool unevenly, leaving dents. Keep walls even.
- Warpage: Parts twist or bend when cooling isn’t balanced. Place gates carefully and allow even cooling.
- Knit lines: Faint lines appear where melted plastic meets. Adjust gate placement or part geometry.
- Flash: Extra plastic squeezes out at parting lines. Design with proper surfaces and tolerances.
- Burn marks: Dark streaks form when air traps or plastic overheats. Add venting and design for smoother flow.
Advanced Techniques and Capabilities
Beyond the basics, there are additional injection moulding techniques that can open up new design options.
- Insert Moulding: Embeds metal components during moulding.Building strength into parts with insert moulding eliminates secondary assembly while improving durability.
- Overmoulding: Adds a softer layer over a rigid part in one step, which is great for grips, seals, and ergonomic features.
- Liquid Silicone Rubber (LSR) moulding: Used for medical and sealing parts because it’s biocompatible, flexible, and chemical-resistant. Handles tricky shapes while keeping strong properties.
- Gas-assisted moulding: Uses pressurised gas to form hollow sections in large parts, cutting weight and material use while reducing sink marks.
Frequently Asked Questions
What volumes make injection moulding cost-effective?
expand_less expand_moreGenerally, production runs of 100 parts or more begin to justify tooling costs, with higher volumes dramatically reducing cost per part.
How long does tooling usually take?
expand_less expand_moreAluminium tooling can be ready in as little as 10–15 days, while steel tools typically take 3–5 weeks.
What is a simple injection moulding example?
expand_less expand_moreA common injection moulding example is a plastic bottle cap. It demonstrates how the process can produce millions of identical, durable parts quickly and cost-effectively.
Which industries benefit most from injection moulding?
expand_less expand_moreMedical, automotive, consumer electronics, and aerospace are leading users, but the process suits any application needing repeatability and precision.
What tolerances can injection moulding achieve?
expand_less expand_moreIn most cases, we can maintain a machining tolerance of +/- 0.08mm with an included resin tolerance that can be greater than but no less than +/- 0.002mm/mm. See our tolerances guide for details.
Can I modify my design after tooling is made?
expand_less expand_moreMinor tweaks are sometimes possible by welding steel or machining, but major changes usually need new tooling. That’s why design validation before tooling is key.
Get Started
Plan early around volumes, performance needs, and budget to set your project up for success.
Ready to move forward? Upload your design for an instant quote and feedback.


