


When comparing potential manufacturing processes against criteria like price and lead-time, there are many things to keep in mind. Different processes require different processing times, different types of materials, and most likely, different part design requirements and considerations. Today, we’re going to cover part design cost drivers. But first, let’s talk about a common cross-process design challenge that we see every day as one of the world’s largest injection mold manufacturers.

Designing for Moldability: A Cautionary Tale
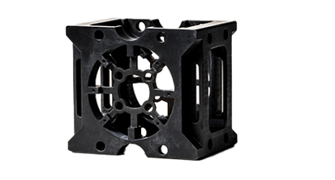
Dexter is an engineer. Dexter has an ingenious part design solution to combine a five-part housing into two parts and save hundreds of thousands of dollars on tooling costs in production. Dexter designs the parts and sends them to his favorite 3D printing company (ahem, Protolabs) to print the parts in SLS so he can perform fit/form/function testing prior to tooling up the parts. When he receives his shipment, he’s ecstatic to find that his parts work wonderfully, and should be a perfect functional solution to his design problem. Ready to start moving into tooling stages, he quotes the parts for injection molding and BAM—none of them are moldable. Dexter hangs his head in shame, walks back to his desk, and starts to redesign the parts for moldability.
This age-old tale is actually our first major cost driver and is arguably a root cause for many other cost drivers as well.

1. Not Starting with the End in Mind
Dexter started with the solution in mind, but not with the process. As 3D printing has become more and more popular (for good reason), many product developers are implementing it into stages that may have been completed in a different process before. This is perfectly fine, if you’re keeping in mind that 3D printing has far fewer design constraints than injection molding. Solution: Start by designing your part for molding, and then take those moldable part designs and print them! Virtually all moldable parts can be printed—but that isn’t true the other way around. When you try to mold a part exclusively designed for 3D printing, your best-case scenario is that the manufacturer probably had to include many costly mechanical components to the mold in order to accomplish it. The worst-case scenario is that it just can’t be done.

2. Mold Base Size
Our second cost driver is the base size of the mold. This is a common point of confusion in the manufacturing process, as it isn’t always evident how large or small the mold base is. For example, a 1 in. x 1 in. (25.4mm x 25.4mm) part in a straight pull mold might be able to be made in a 4 in. x 4 in. (101.6mm x 101.6mm) mold base. Add an undercut to that part, requiring a side action cam in the mold, and suddenly you might be into a 10 in. x 10 in. (254mm x 254mm) mold base or larger. In this case, base size and componentry drive mold cost. A single side action might add $1,500+ to the mold cost, so design best practices like pass-thru cores to help you save big on space and components!
3. Internal Componentry
We touched on this in numbers 1 and 2, but outside of poor design and mold size, internal componentry is the key cost driver in an injection mold. What types of internal componentry? As we previously discussed, side actions cams are an obvious example in this department. Some other examples of internal componentry could be: pick-out inserts, bolt-in inserts, or steel core pins. Cams or inserts will typically increase your overall mold price by $1,000-2,000 per component, so keep that in mind while you’re designing.

4. Polish or Custom Finishing
Our last cost driver is polish or custom finishing. Most manufacturers will offer a range of finishes to choose from on your parts, like in-house, SPI, or Mold-Tech equivalent finishes. We offer all three of these categories, and all have varying degrees of cost increases associated with them. In-house finishes will usually be the cheapest and are sometimes automated or as-milled. These are great for prototype parts to test fit/form/function but might not carry the aesthetic properties needed for a production part. SPI or Mold-Tech equivalent finishes tend to be the expensive ones, so you can save time and cost by waiting to put these cosmetic finishes on the mold until after your design is finalized.
Follow these tips and you’re ready for production!

