
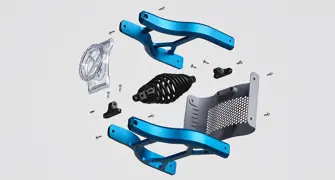
CNC Machining vs. Metal 3D Printing for Metal Parts
Understand the trade-offs between subtractive and additive manufacturing, and when to combine both technologies
CNC machining vs. metal 3D printing isn't a question of which process is better, but which is better suited to the part you're making. Each has distinct strengths, and understanding where they differ can help you reduce cost, improve part performance, and manufacture more efficiently.
CNC Machining vs. Metal 3D Printing: When to Use Each Process
Nowhere is this relationship more significant than the bond that exists between CNC machining and direct metal laser sintering (DMLS), the leading technology for 3D printing complex metal parts. The latter can produce virtually any part shape using nothing more than a laser beam and a pile of metal powder, but it can be a slow process. Machining on the other hand is more limited in terms of geometry, but offers far faster production speeds. When comparing CNC machining vs. metal 3D printing, the decision often comes down to two questions: Can the part be machined, and how many parts need to be produced?
In many cases, the two manufacturing processes can work together. Oftentimes metal-based additive manufacturing relies on its subtractive alter ego to finish the job. Holes must be bored or reamed, threads tapped or thread-milled, critical surfaces milled, turned, or ground to size. At the very least, 3D-printed parts need some manual TLC in the form of cleaning, blasting, and support removal, pretty much guaranteeing a visit to the machine shop.
What does all this mean to you or anyone looking for the most effective way to manufacture functional prototypes and lower quantities of end-use metal parts? Plenty. By adopting a strategy where metal 3D printing and machining can be different steps in the same manufacturing process, you can leverage the best of both worlds, eliminating surprises, reducing costs, and improving part design. Here’s a handful of design considerations to think about before diving into your next metal part design project.
Manoeuvring Through Metal Manufacturing
Metal 3D printing and machining work well together for:
- Improving part accuracy
- Finishing requirements
- Machined removal of printed supports
- Component fixturing, when needed
Building vs. Cutting Metal Parts
DMLS builds metal parts layer by layer by selectively fusing metal powder with a laser. CNC machining, by comparison, removes material using cutting tools. While DMLS excels at producing complex geometries, CNC machining delivers tighter tolerances and finer surface finishes.
Accuracy Considerations for Metal Parts
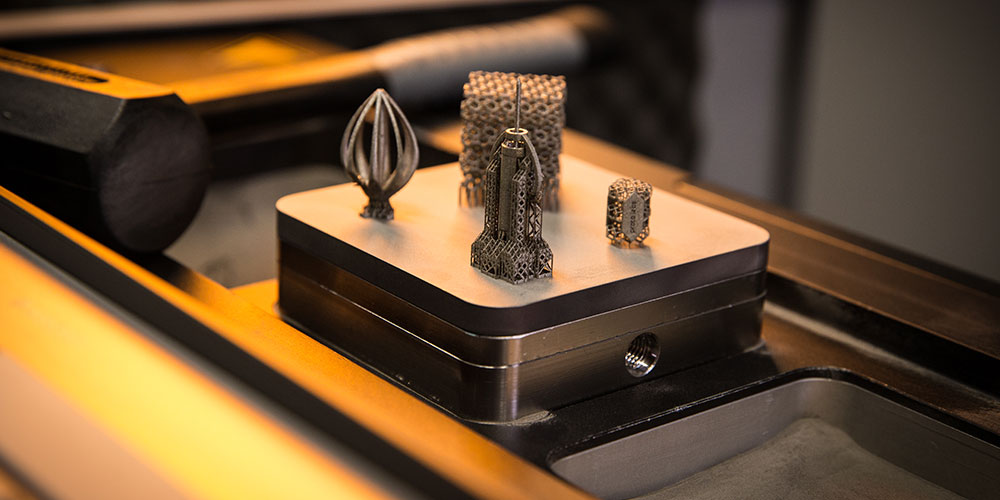
Although DMLS can create extremely complex shapes that might otherwise be un-manufacturable, it’s not without its limitations. For starters, significant heating and cooling of the metal takes place as the laser does its work, creating internal stresses that must be removed via post-build heat-treating. This means little to the people designing the part, except that stress relief equates to some amount of part movement and therefore some loss of accuracy. This is one reason—though not the only one—why even a well-designed DMLS-produced part requires machining of any part feature where tolerances tighter than ±0.003 in. (0.076mm) is required, plus ±0.001 in./in. (0.001mm/mm) for each additional inch of build height.
Finishing Where DMLS Leaves Off
Another reason for combining DMLS and machining is surface finish. On a vertical or horizontal surface, DMLS produces part roughness about equal to a sand casting. All other surfaces will see some amount of stair-stepping, an effect that’s largely dependent on how the part is situated in the build chamber. If your part design requires a smooth finish, it will need to be blasted, sanded, or quite possibly machined. This last part is no big deal, unless your part design calls for a fine finish on a surface that the end mill, drill, or turning tool can’t reach. Whatever the case, be sure to call out such critical features on your CAD model when submitting to Protolabs, so the features needing secondary processing, including machining, can be identified.

Removing DMLS Supports
Support structures should also be considered when designing metal parts in additive manufacturing. DMLS is a little like building a metal sandcastle—without some seashells and twigs to hold the thing together, the ramparts will fall, the architraves crumble. With DMLS, scaffold-like supports are needed to keep the semi-molten metal from drooping, curling, or otherwise misbehaving. Oftentimes, these supports can be removed with a Dremel tool, but machining may be the preferred method where larger part volumes are called for, or when the workpiece is headed to the machine shop anyway for one of the drilling, milling, or turning operations mentioned previously.
Fixturing Printed Parts
Unlike DMLS, which requires nothing more than a simple “build plate” to carry the workpiece through to completion, machined parts must be clamped, bolted, or otherwise securely fixtured to the machine to prevent cutting tool-induced movement. If your 3D-printed workpiece is composed entirely of curved, organic shapes (which is one of 3D printing’s greatest appeals), how will the machinist hang on to it for turning or milling? Check with an applications engineer at Protolabs, but you might need to design in a pair of parallel surfaces or some mounting holes by which to clamp the 3D-printed workpiece for machining.

Mulling Over Machinability
Lastly, there’s the metal to think about. The lasers used by DMLS don’t really “care” how hard or tough a metal is, but cutting tools sure do. DMLS is known for its ability to 3D print aerospace- and medical-grade metals like titanium, Inconel, cobalt chrome, and others, and even though different laser parameters and build speeds may be called for, it does so with relative impunity. Machining those same metals, on the other hand, requires lighter depths of cut, slower speeds and feeds (a little machining-speak here), and will consume more cutting tools and machining time. To see all of Protolabs metal options for machining and 3D printing, head over to the material comparison guide. Beyond the guide’s list, you may have other materials-related questions. For example, if Protolabs doesn’t machine a certain material, it doesn’t necessarily mean we also would not post-machine it in 3D printing—we might. For these specific questions, contact one of our applications engineers at 877-479-3680 or [email protected].
Combining Complex Metal Manufacturing Processes
The CNC machining vs. metal 3D printing decision isn't always an either-or choice. Many metal parts benefit from combining both processes to achieve complex geometry, tight tolerances, and the required surface finish. Machining and metal 3D printing are deep, complex technologies, and it’s only by understanding how each will affect your design project that success will be achieved. Ask questions, embrace each process, and understand that both are close-knit partners in manufacturing.
If you have a metal part design that could benefit from combining 3D printing and CNC machining, you can indicate that during the 3D printing quoting process. When uploading your CAD file, select the custom finish option and add notes specifying which features or surfaces require additional finishing. You can also attach documents, like a drawing, to identify tolerances, surface finishes, and other manufacturing requirements.
FAQ
When should I design a metal part for both CNC machining and 3D printing?
expand_less expand_moreIf your part includes complex geometry alongside tight tolerances or precision mating surfaces, combining the two processes often delivers the best result. Planning for post-machining early can improve quality and reduce redesigns.
Which features are best left for secondary machining on a DMLS part?
expand_less expand_moreFeatures such as precision holes, threads, bearing seats, sealing surfaces, and tight-tolerance interfaces are typically better finished with CNC machining. DMLS creates the geometry, while machining delivers the required accuracy and surface finish.
How can I make a metal part easier to both print and machine?
expand_less expand_moreDesign with the full manufacturing process in mind. Include accessible fixturing surfaces where needed, identify critical dimensions for machining, and consider how supports and finishing operations will affect the final part.
|


