Inspection Reports
We offer various dimensional inspection reports to support your critical dimension verification and quality documentation requirements, such as FAIs. Compare the benefits of each to see which is best suited for your project.
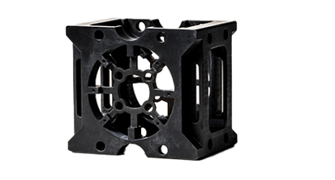
Injection Molding Inspection Reports
| Benefits | Provides simple evidence of inspection on a feature or features to verify molded parts match the provided model |
|---|---|
| Measurements | Plane-to-plane and outside diameter dimensions based on your CAD model (X, Y, Z) to quoted tolerances |
| Eligibility | Available upon request for most injection molding orders |
| 2D Drawings | Not required |
| Additional Lead Time | None |
| Sample Plan | Conducted on a regular basis throughout the part run |
| Benefits | Provides a dimensional partial first article inspection of critical features (customer defined through highlighted features on attached print and confirmed through an Inspection Statement of Work) |
|---|---|
| Measurements | Selected features per Inspection Statement of Work. May include plane-to-plane, hole-to-hole, ID/OD, or radii measurements as critical features. |
| Additional Features | Formatted report with bubbled part image and measurement results |
| Eligibility | Unlimited/On-demand manufacturing, injection molding orders. Can be added to any other order (excludes: Thermoplastic elastomers (TPU, TPV, TPO, etc.) and liquid silicone rubber (LSR)) |
| 2D Drawings | During checkout, upload a 2D drawing with critical features identified (circled/highlighted). In addition, define part and feature quantities needed. |
| Additional Lead Time | None |
| Price | 3 parts or 5 features are free for first Unlimited Sample order. Limited mold orders and any subsequent part order starts at $500 |
| Sample Plan | After establishing the molding process, a partial FAI is done using samples of the first parts off the tool |
| How to Request | Available to select in "Inspections" during checkout |
| Benefits | Provides a dimensional capability study of critical features (customer defined through highlighted features on attached print and confirmed through an Inspection Statement of Work) |
|---|---|
| Measurements | Selected features per Inspection Statement of Work. May include plane-to-plane, hole-to-hole, ID/OD, or radii measurements as critical features |
| Additional Features | Formatted report with bubbled part image, measurement results, and summary chart |
| Eligibility | Unlimited/On-demand manufacturing, injection molding orders. Can be added to any other order (excludes: Thermoplastic elastomers (TPU, TPV, TPO, etc.) and liquid silicone rubber (LSR)) |
| 2D Drawings | During checkout, upload a 2D drawing with critical features identified (circled/highlighted). In addition, define part and feature quantities needed. |
| Additional Lead Time | None |
| Price | 3 parts or 5 features are free for first Unlimited Sample orders. Limited mold orders and any subsequent parts orders start at $1,500 |
| Sample Plan | After establishing the molding process, the capability report will be based on customer-defined quantity of parts taken from a set of evenly distributed samples while the order is running (30-part minimum) |
| How to Request | Available to select in "Inspections" during checkout |
| Benefits | Verifies numerous critical dimensional specifications |
|---|---|
| Measurements | Up to 50 measurements: ID/OD, plane-to-plane, hole location, and angles |
| Additional Features | Available as defined at time of quote |
| Eligibility | Molding orders. Eligibility will be determined at time of quote based on requested inspection |
| 2D Drawings | Required. Available to select in "Inspections" during checkout. |
| Additional Lead Times | Quoted at time of order, typically 6+ business days |
| Price | Additional charges apply. contact your account representative for more details |
| Sample Plan | Samples are selected during the molding operation based on requested quantity specified |
| How to Request | At time of quote, select "Dimensional Inspection Report" under "Choose Additional Services. This will prompt our team to work with you to understand your needs |
| Benefits | Verifies that a production process can reliably product a quality part repeatedly |
|---|---|
| Measurements | Provided through IM CTQ and DIR offerings, depending on customer needs and requirements |
| Additional Features | Level 3 PPAP document is provided in PDF format for requested manufacturing orders |
| Eligibility | All injection molding orders |
| 2D Drawings | Required. Available to select in "Inspections" during checkout. |
| Additional Lead Times | Quoted at time of order, typically 11+ business days |
| Price | $1,500, in addition to the chosen inspection method requested |
| Sample Plan | Sample plan is based on the inspection requested |
| How to Request | PPAP can be ordered with CTQ inspection through the "Inspection" drop down menu or selected at time or quote through "Additional Services", if more in depth inspection is required. |
Additional inspections are available and tailored to your requirements, allowing verification of numerous critical dimensions.
Available to select in "inspections" during checkout. Contact your account representative with questions.
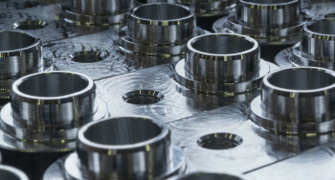
CNC Machining Inspection Reports
| Benefits | Parts are inspected. No measurement results are provided. A Certificate of Conformance is available. |
|---|---|
| Measurements | Protolabs quality control inspects parts to conform with quoted dimensional and visual standards. |
| 2D Drawings | Optional |
| Additional Lead Time | None |
| Sample Plan |
Precision CNC Machining Factory: After the parts have completed manufacturing, one piece from the lot is inspected to quoted dimensional tolerances and your visual standards. We perform AQL sample places for quantities over 50. Quick-Turn CNC Machining Factory: 100% of parts are inspected. |
| How to Request | Default |
| Benefits | Parts are inspected and an inspection report with measurements is included. |
|---|---|
| Measurements | Protolabs quality control will inspect dimensions to quoted tolerances |
| 2D Drawings | Optional |
| Additional Lead Time | None |
| Sample Plan |
Precision CNC Machining Factory: After the parts have completed manufacturing, one piece from the lot is inspected to quoted dimensional tolerances and your visual standards. We perform AQL sample places for quantities over 50. Quick-Turn CNC Machining Factory: 100% of parts are inspected. |
| How to Request | During Quote |
| Benefits | Verifies numerous dimensional specifications without requiring a 2D drawing |
|---|---|
| Measurements | Protolabs quality control will inspect approximately 10 dimensions to quoted tolerances. GD&T will not be inspected. |
| Additional Features | Formatted report with bubbled part image and results summary chart |
| 2D Drawings | Optional |
| Additional Lead Time | None |
| Sample Plan |
Precision CNC Machining Factory: After the parts have completed manufacturing, one piece from the lot is inspected to quoted dimensional tolerances and your visual standards. We perform AQL sample places for quantities over 50. Quick-Turn CNC Machining Factory: 100% of parts are inspected. |
| How to Request | During Quote |
| Benefits | Verifies the sample part conforms to all dimensions provided on a 2D drawing. |
|---|---|
| Measurements | Protolabs quality control will inspect 100% of dimensions provided on a 2D drawing, including GD&T. Quoted tolerances apply |
| Additional Features | FAI produced on a template conforming to AS9102C standard. |
| 2D Drawings | Required |
| Additional Lead Time | 1 day |
| Sample Plan |
Precision CNC Machining Factory: After the parts have completed manufacturing, one piece from the lot is inspected to quoted dimensional tolerances and your visual standards. We perform AQL sample places for quantities over 50. Quick-Turn CNC Machining Factory: 100% of parts are inspected. |
| How to Request | During Quote |
3D Printing Inspection Reports
| Benefits | Includes a dimensional report of requested features, without pass/fail indication. |
|---|---|
| Measurements | Bubbled/CTQ dimensions if indicated, otherwise all toleranced dimensions. |
| Additional Features | Formatted report with bubbled part image and result summary chart |
| Eligibility | All 3D printing technologies |
| 2D Drawings | Required |
| Additional Lead Time | 2+ business days |
| Sample Plan | One part per geometry, unless otherwise specified |
| Benefits | Includes a pass/fail dimensional report of requested features |
|---|---|
| Measurements | Bubbled/CTQ dimensions if indicated, otherwise all toleranced dimensions |
| Additional Features | Formatted report with bubbled part image and result summary chart |
| Eligibility | DMLS, SLS, MJF |
| 2D Drawings | Required |
| Additional Lead Time | 2+ business days |
| Sample Plan | One part per geometry, unless otherwise specified |
| Benefits | Includes a dimensional report of all features in AS9102 FAIR format |
|---|---|
| Measurements | All dimensions and drawing notes |
| Additional Features | Full 3-page AS9102 document and matching bubbled drawing |
| Eligibility | DMLS, SLS, MJF |
| 2D Drawings | Required |
| Additional Lead Time | 2-5+ business days |
| Sample Plan | One part per geometry |
Sheet Metal Fabrication Inspection Reports
| Benefits | Parts are inspected. No measurement results are provided. A Certificate of Conformance is provided. |
|---|---|
| Measurements | Protolabs quality control inspects parts to conform with quoted dimensional and visual standards |
| 2D Drawings | Optional |
| Additional Lead Time | None |
| Sample Plan | After the parts have completed manufacturing, one piece from the lot is inspected to quoted dimensional tolerances and your visual standards. We perform AQL sample places for quantities over 50. |
| Benefits | Verifies numerous dimensional specifications without requiring a 2D drawing |
|---|---|
| Measurements | Protolabs quality control will inspect approximately 10 dimensions to quoted tolerances. GD&T will not be inspected. |
| Additional Features | Formatted report with bubbled part image and results summary chart. |
| 2D Drawings | Optional |
| Additional Lead Time | None |
| Sample Plan | After the parts have completed manufacturing, one piece from the lot is inspected to quoted dimensional tolerances and your visual standards. We perform AQL sample places for quantities over 50. |
| Benefits | Verifies the sample part conforms to all dimensions provided on a 2D drawing |
|---|---|
| Measurements | Protolabs quality control will inspect 100% of dimensions provided on a 2D drawing, including GD&T. Quoted tolerances apply. |
| Additional Features | FAI produced on template conforming to AS9102C standard |
| 2D Drawings | Required |
| Additional Lead Time | 1 day |
| Sample Plan | After the parts have completed manufacturing, one piece from the lot is inspected to quoted dimensional tolerances and your visual standards. We perform AQL sample places for quantities over 50. |

