Inspections for Injection Molded Parts
Certifications
ISO 9001:2015 | ITAR Registered
Injection Molding Inspection Reports
As part of the Protolabs standard, we measure up to four plane-to-plane and outside diameter dimensions based on your CAD model (X, Y, Z) to quoted tolerances. We automatically define these quality control checks and perform the measurements on a sampling of parts.
In addition, we provide a wide range of other quality documentation. Compare the benefits of each inspection report to see which is best suited for your project needs.
Critical To Quality (CTQ)
| Benefits | Provides a dimensional first article inspection of critical features (customer selects features defined through an Inspection Statement of Work) |
|---|---|
| Measurements | Selected features per Inspection Statement of Work. May include plane-to-plane, hole-to-hole, ID/OD, or radii measurements as critical features |
| Service Provided By | Protolabs |
| Additional Features | Formatted report with bubbled part image and result summary chart |
| Eligibility | On-demand manufacturing, injection molding orders. Can be added to any other order (excludes: Thermoplastic elastomers (TPU, TPV, TPO, etc.) and liquid silicone rubber (LSR)) |
| Additional Lead Time | None |
| Price | Default of 3-piece up to 5 feature partial FAI provided at no additional charge on new unlimited mold orders. For additional part quantities, features, or to add to repeat orders, partial FAI can be modified a la carte. (Starting at $500) |
| Sample Plan | After establishing the molding process, a partial FAI is done using samples of the first parts off the tool |
| Additional Information | Available to select in "inspections" during checkout. Upload a 2D drawing with critical features identified. In addition, define part and feature quantities needed. Contact your account representative with questions |
*Excludes: Thermoplastic elastomers (TPU, TPV, TPO, etc.) and Liquid Silicone Rubber (LSR).
| Benefits | Provides a dimensional capability study of critical features (customer selects features defined through an Inspection Statement of Work) |
|---|---|
| Measurements | Selected features per Inspection Statement of Work. May include plane-to-plane, hole-to-hole, ID/OD, or radii measurements as critical features |
| Service Provided By | Protolabs |
| Additional Features | Formatted report with bubbled part image and result summary chart |
| Eligibility | On-demand manufacturing, injection molding orders. Can be added to any other order (excludes: Thermoplastic elastomers (TPU, TPV, TPO, etc.) and liquid silicone rubber (LSR)) |
| Additional Lead Time | None |
| Price | Default of 30-piece up to 5 feature Capability Study provided at no additional charge on new unlimited mold orders. For additional part quantities, features, or to add a repeat order, Capability Study can be modified a la carte. (Starting at $1,500) |
| Sample Plan | After establishing the molding process, the capability report will be based on customer-defined quantity of parts taken from a set of evenly distributed samples while the order is running (30-part minimum) |
| Additional Information | Available to select in "inspections" during checkout. Upload a 2D drawing with critical features identified. In addition, define part and feature quantities needed. Contact your account representative with questions |
*Excludes: Thermoplastic elastomers (TPU, TPV, TPO, etc.) and Liquid Silicone Rubber (LSR).
Additional Inspection Reports
| Benefits | Verifies numerous critical dimensional specifications |
|---|---|
| Measurements | Up to 50 measurements: ID/OD, plane-to-plane, hole location, and angles |
| Service Provided By | A trusted third-party supplier (if lead time is critical, call your account representative for other options) |
| Additional Features | Options include a 360-degree, 8+/-position 3D scanner that collects data, identifies dimensional variance, and creates a visual aid and color map for a direct CAD-to-scan comparison |
| Eligibility | On-demand manufacturing, injection molding orders |
| Additional Lead Time | Quoted at time of order, typically 6+ business days |
| Price | Additional charges apply. Contact your account representative for details |
| Sample Plan | Random selection during the molding operation based on requested quantity specified |
| Additional Information | Available to select in "inspections" during checkout. Contact your account representative with questions |
| Benefits | Verifies that a production process can reliably produce a quality part repeatedly |
|---|---|
| Measurements | Nineteen components that range from customer approval to sample part production |
| Service Provided By | A trusted third-party supplier (if lead time is critical, call your account representative for other options) |
| Additional Features | Level 3 PPAP document is provided in PDF format for requested manufacturing orders |
| Eligibility | All injection molding orders |
| Additional Lead Time | Quoted at time of order, typically 11+ business days |
| Price | Additional charges apply. Contact your account representative for details |
| Sample Plan | Random selection during the molding operation based on requested quantity specified |
| Additional Information | Available to select in "inspections" during checkout. Contact your account representative with questions |
Custom Inspection
Additional inspection options are available, tailored to your requirements, allowing verification of numerous critical dimensions.
Contact your account representative to request a custom inspection.
How are Part Dimensions Measured?
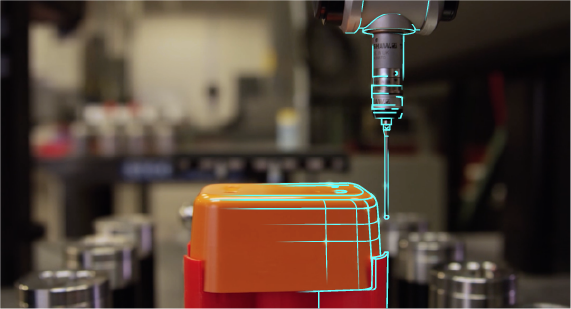
We use industry standard coordinate-measuring machines (CMM)—calipers and pin guages—just as you would expect from an industry leading manufacturing partner. What differentiates our process is that we’ve applied patented automation technology to our CMMs to enable in-process inspection with no additional cost or lead time.
Parts are measured at an equidistant cadence of n/30 where n = total part order quantity. Along with the measurement data from each part, the Capability Report will also provide the average measurement, standard deviation, and a Process Capability Index (Cpk) value for all critical dimensions.
Additional Quality Capabilities
Medical Molding Capabilities
We do offer ISO 13485 injection molding capabilities through trusted partners.
